About Turnitin
Turnitin
Turnitin is a web-based tool for preventing plagiarism that gives a similarity ranking and highlights any passages that are identical to those in other sources, enabling students to review and revise their work before submitting it.
Follow these simple steps to register and get an account with TURNITIN
Dear participants, this tutorial will take you through a step-by-step process on how to check for plagiarism in your articles. This is specifically for the instructor and it is done in three (3) steps; 1. create class, 2. Add assignment, 3. Enroll student.
Turnitin Home page:
Below is the Turnitin home which can be accessed via the following URL: https://www.turnitin.com/

Login to Turnitin
From the above screenshot, locate the login page which can be found at the top right corner as shown by orange arrow. Upon accessing the login link, the login page shown below will appear.
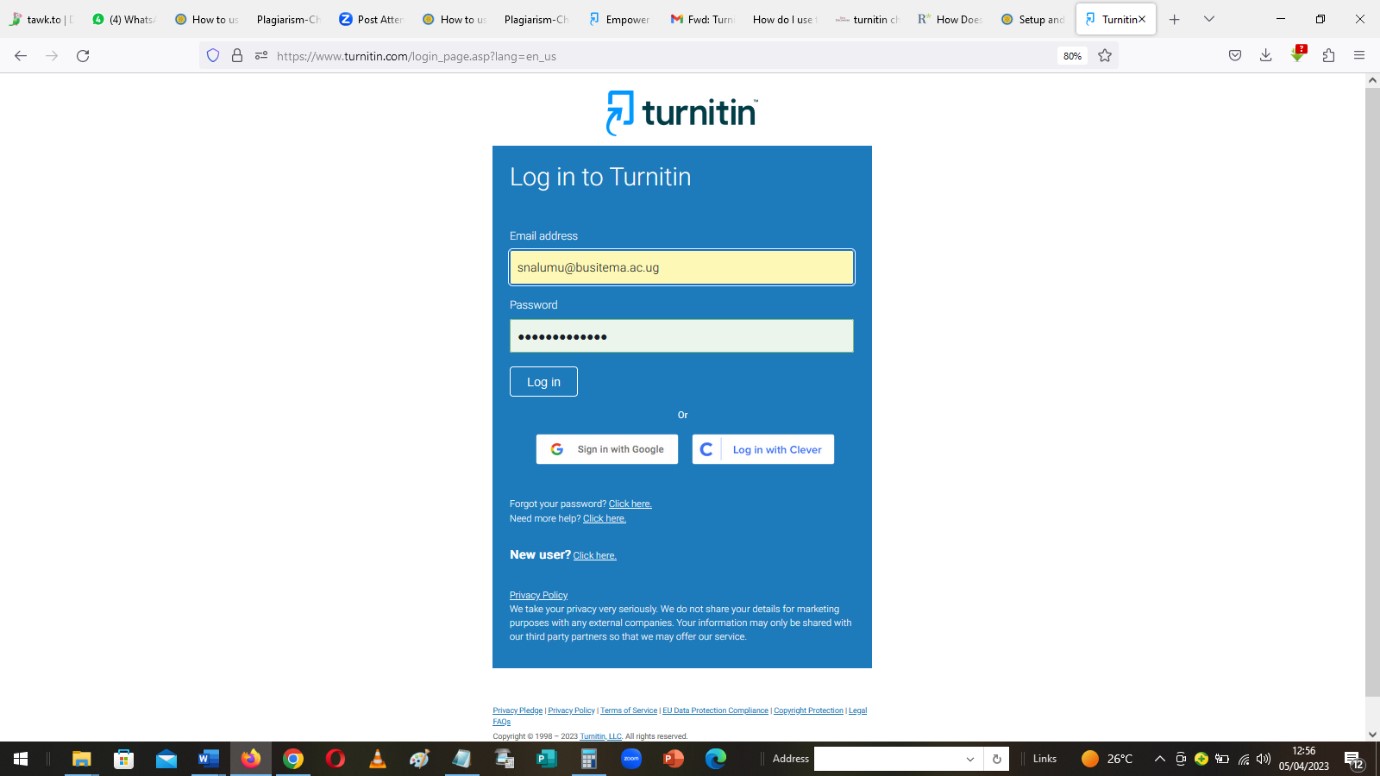
Use your BUSITEMA UNIVERSITY email and the password you used to setup your Turnitin account to login. In case you don’t have, contact ICT department to have your account created upon which you contact the director RPI to send you the Turnitin account creation link.
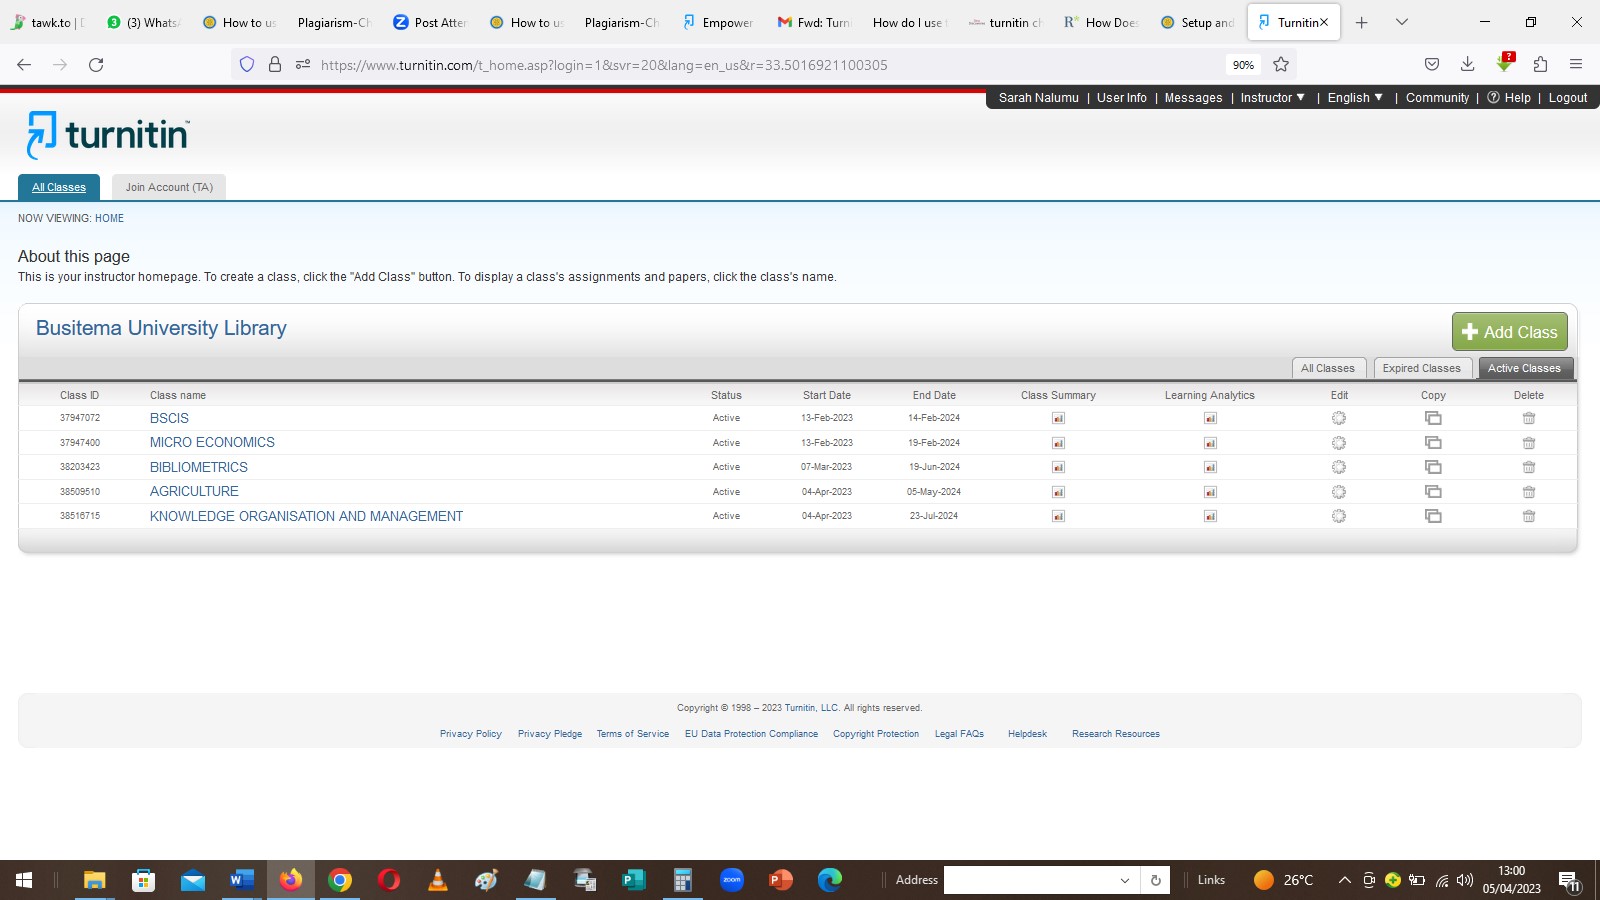
After logging in, user home page appears as shown in the below;
Submitting your documents in the instructor account to check for plagiarism.
For an instructor to check for plagiarism of the document, he/she needs to creating the class first.
Classes are your foundation in Turnitin. Most activity between you and your students occurs within classes you create. Creating a class allows you to work with a specific group of students and easily organize their submissions by assignment. You can access your classes and assignments between the date of the class creation and the selected expiration date. We recommend including a buffer for grade changes and late assignment submissions. This tutorial will show you how to check your own document for plagiarism without students. This effectively allows you to switch between instructor and student accounts. This will be shown later after creating the class and the assignment.
Step 1
Creating a class.
By default, the user home page allows to immediately proceed to create your class as shown in the previous diagram.
Proceed and click ‘Add Class’, and the page will appear as below;
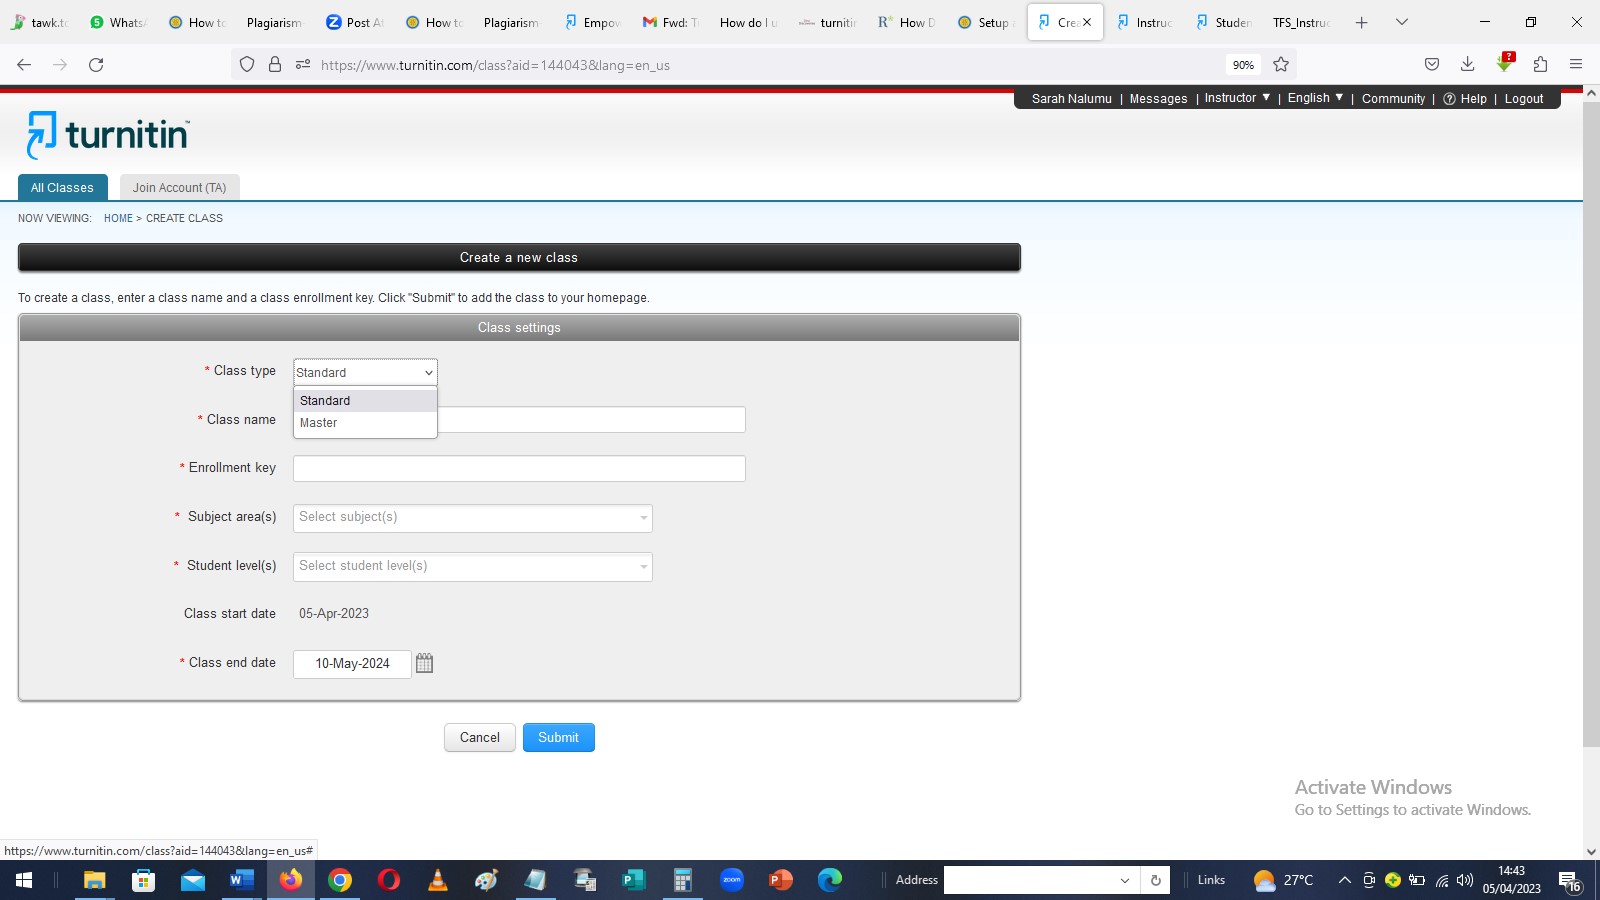
Class type has two options (standard and master). Always select standard. In case you have teaching assistants who you will assign other classes, then choose master (rarely).
When creating class, all fields marked * are mandatory.
- Assign a class name. eg. BIT
- Choose an enrollment key to be used to enroll in the class named BIT. In this example, our enrollment key will be: 123456
- Select subject areas. Just tap in that space and subject areas will appear. You can choose more than one applicable subject area. For the purpose of checking your own document, one subject area is enough.
- Select the student age groups. Tip: always select 18+The class start date is automatically put by the Turnitin system and its usually the day the assignment was created.
- Choose when the class ends. By default, Turnitin assigns the class end date as a year after you created the class. This can be modified depending on the instructor’s preferences.
- Click submit to create your class. The next page will appear as indicated in the image below
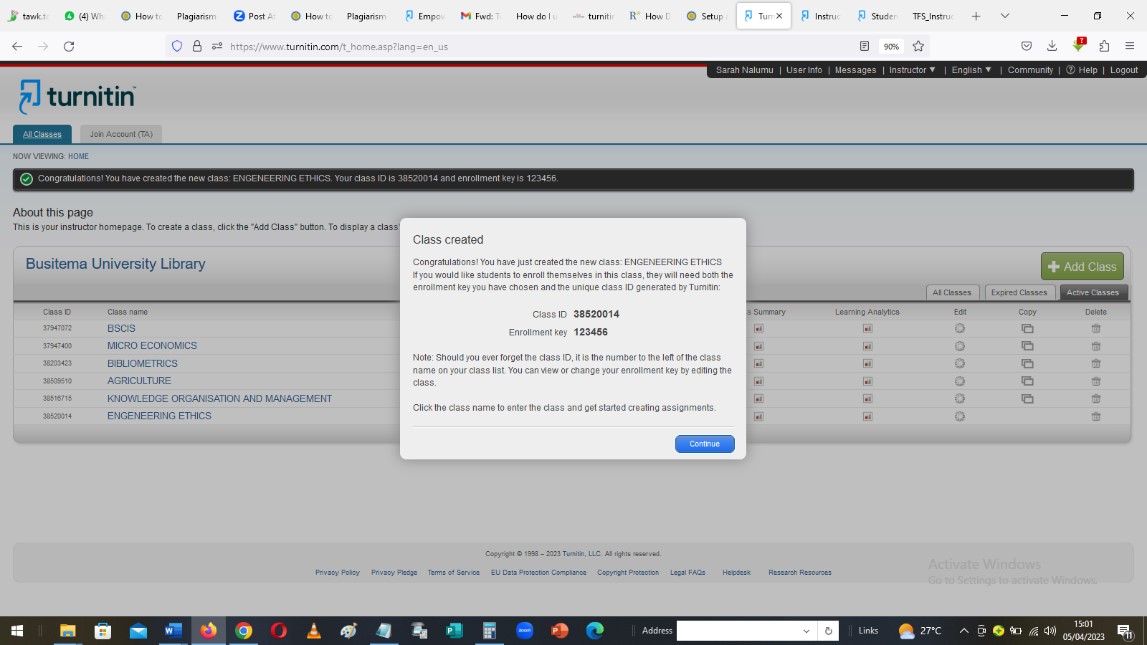
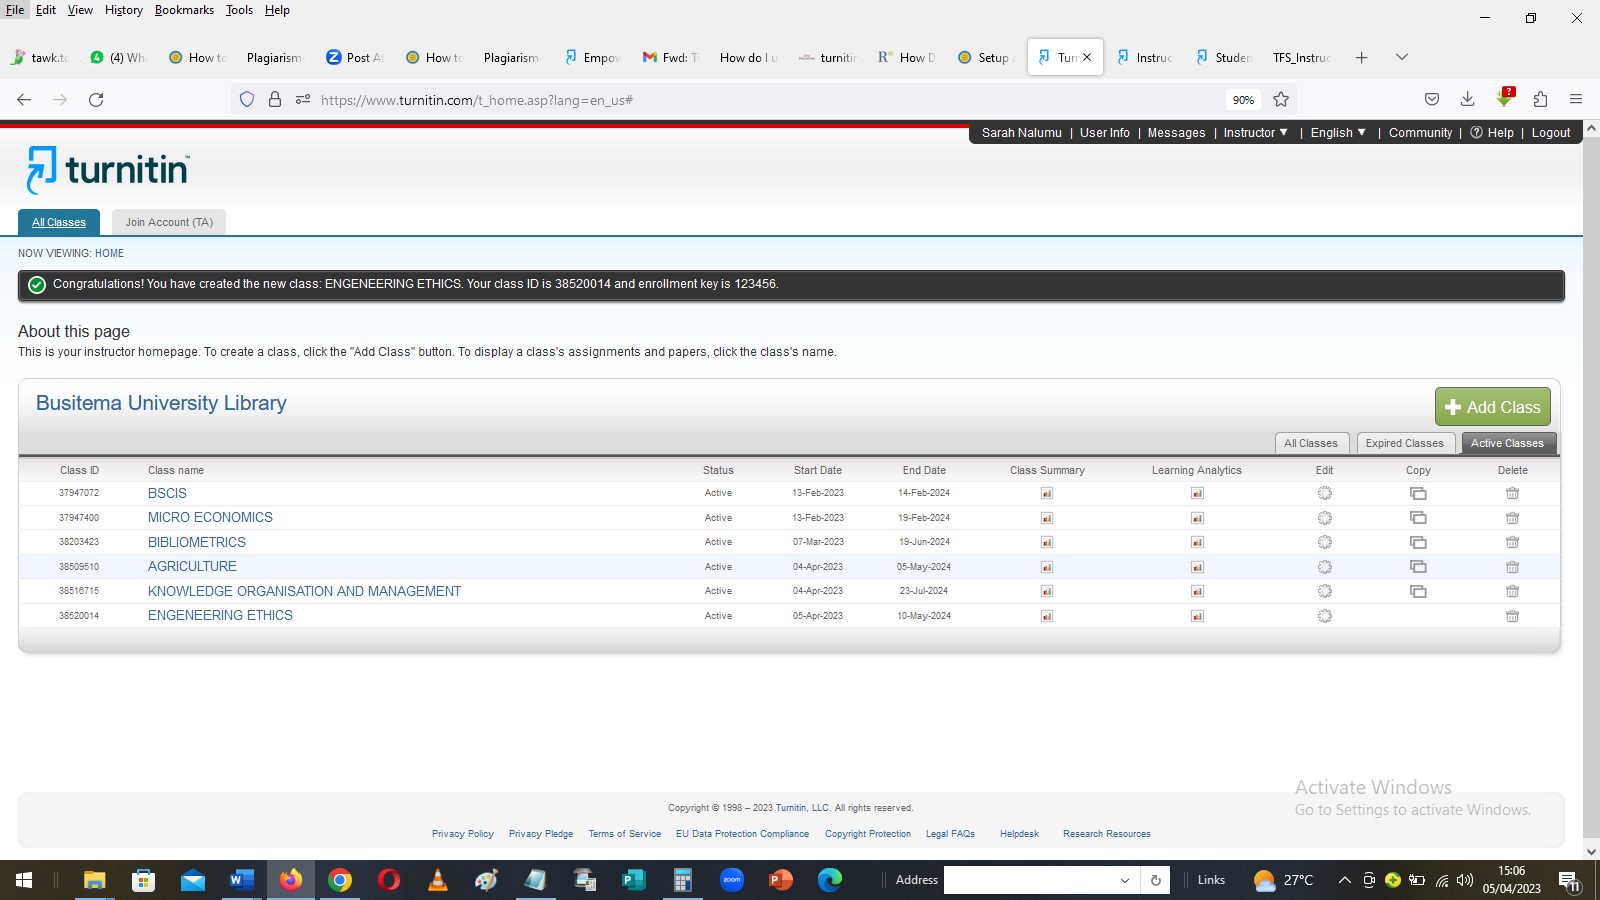
The class will now appear in your class list on the instructor homepage. The number to the left of your class name is the class ID. Students will use this ID, along with the class enrollment key, to enroll in your class. Instructors can view class enrollment key at any time by clicking the gear-shaped edit icon to the right of your class.
Instructor can distribute a class ID and enrollment key to students so that they can enroll in a class and submit their papers.
By clicking continue to close another window is displayed displaying class created as shown in the image below;
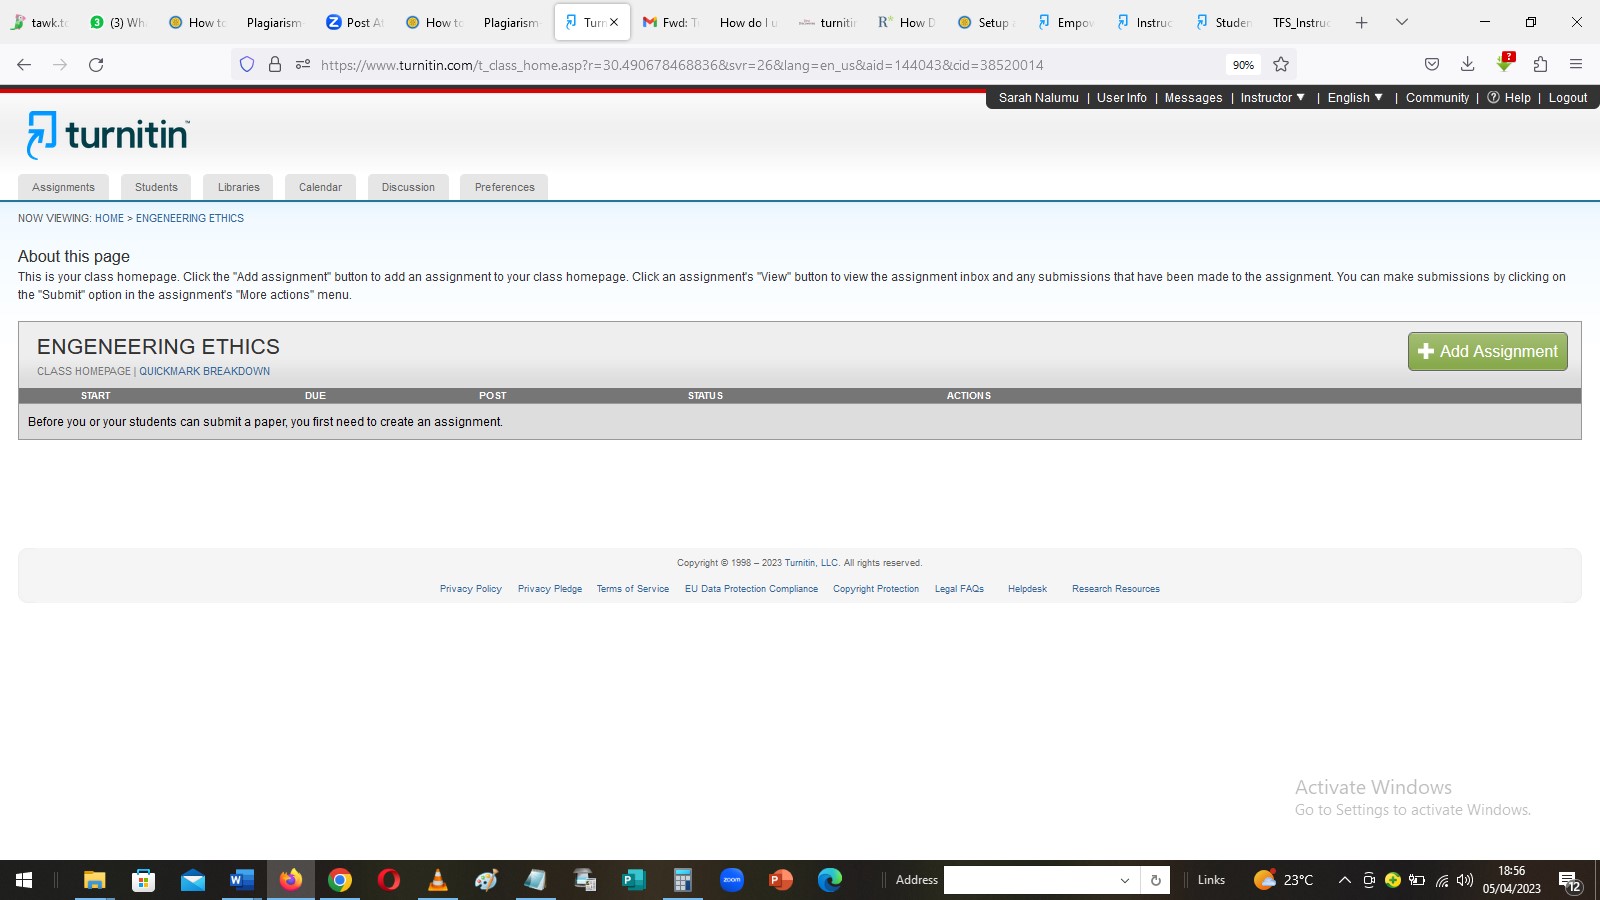
Create assignment.
Within your class homepage click on the Add Assignment button to create an assignment. Enter an assignment title and choose a start and due date for the assignment.
Turnitin can check for similarity. However, for non-writing assignments, instructors can select Allow any file type.
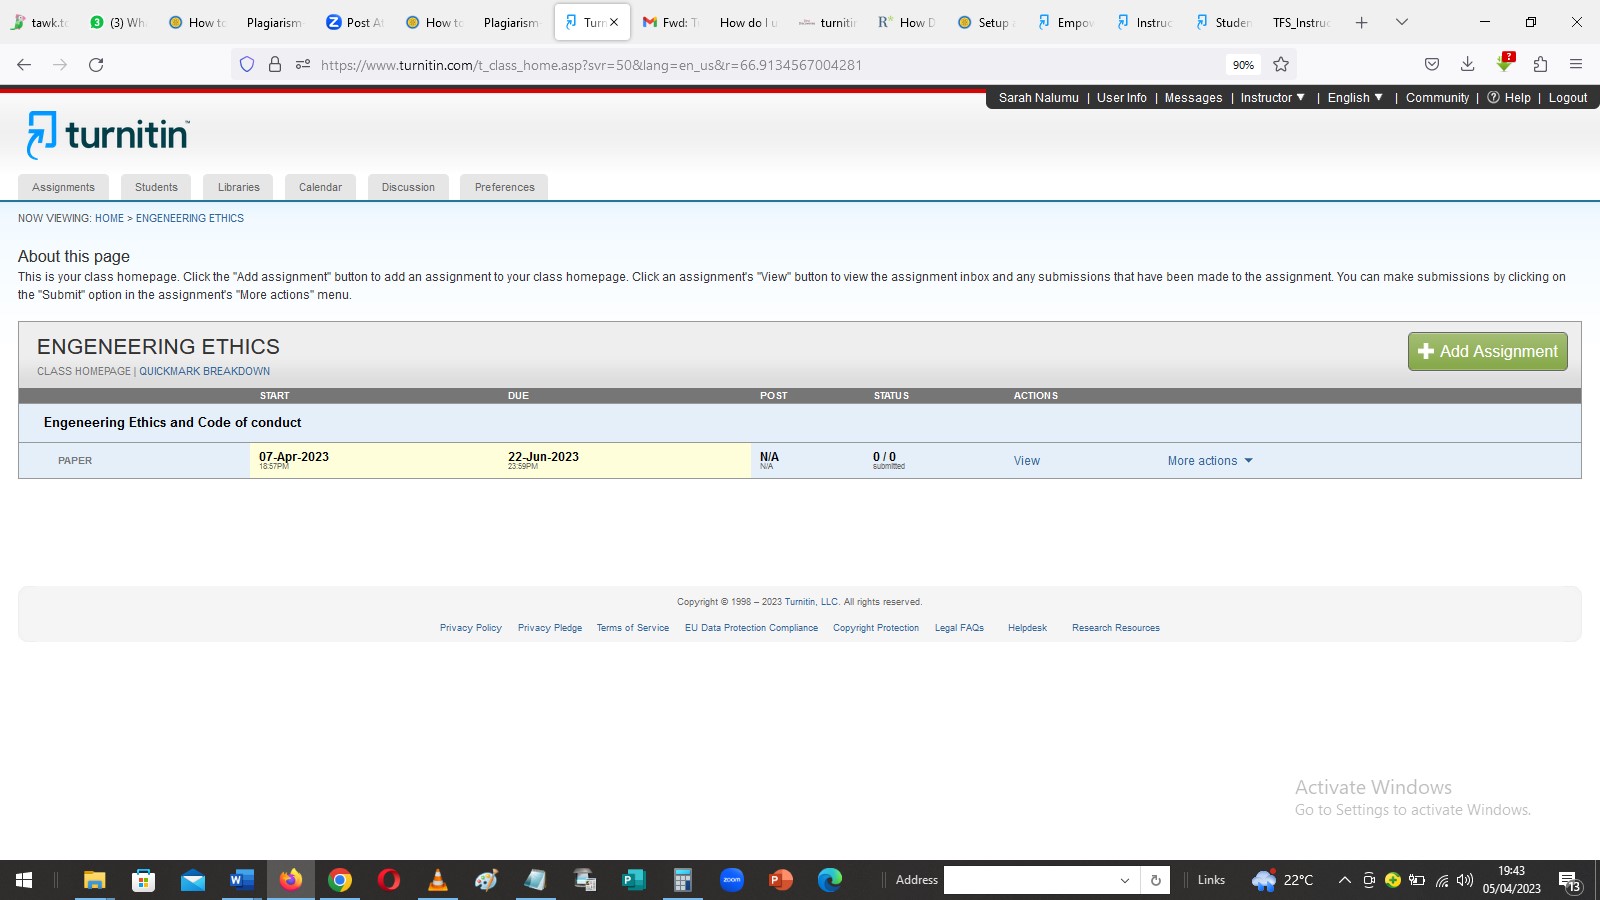
In this example, we are filling in using the below information. The assignment can be named as per your “Engineering Ethics and code of conduct”.
NOTE: ALWAYS SELECT NO REPOSITORY in the Submit papers to allow submission of the same document many times after correction made on similarity check, after click on submit to complete assignment creation.

If Allow any file type is selected, instructors can leave feedback on and download submitted files, but Turnitin may not be able to generate similarity reports or display the uploaded file within the Turnitin Viewer.
Similarity Reports can be generated for the following file types:
- Microsoft Word
- PowerPoint
- WordPerfect
- PostScript
- HTML
- RTF
- OpenOffice (ODT)
- Hangul (HWP)
- Google Docs, Google Slides, Google Sheets (submitted via the Google Drive submission option),
- Plain text files
Students will be able to submit their papers to the assignment starting on the start date and until the due date passes.
Select the Submit button to add the assignment to your class homepage and the page will appear like below
Step 2
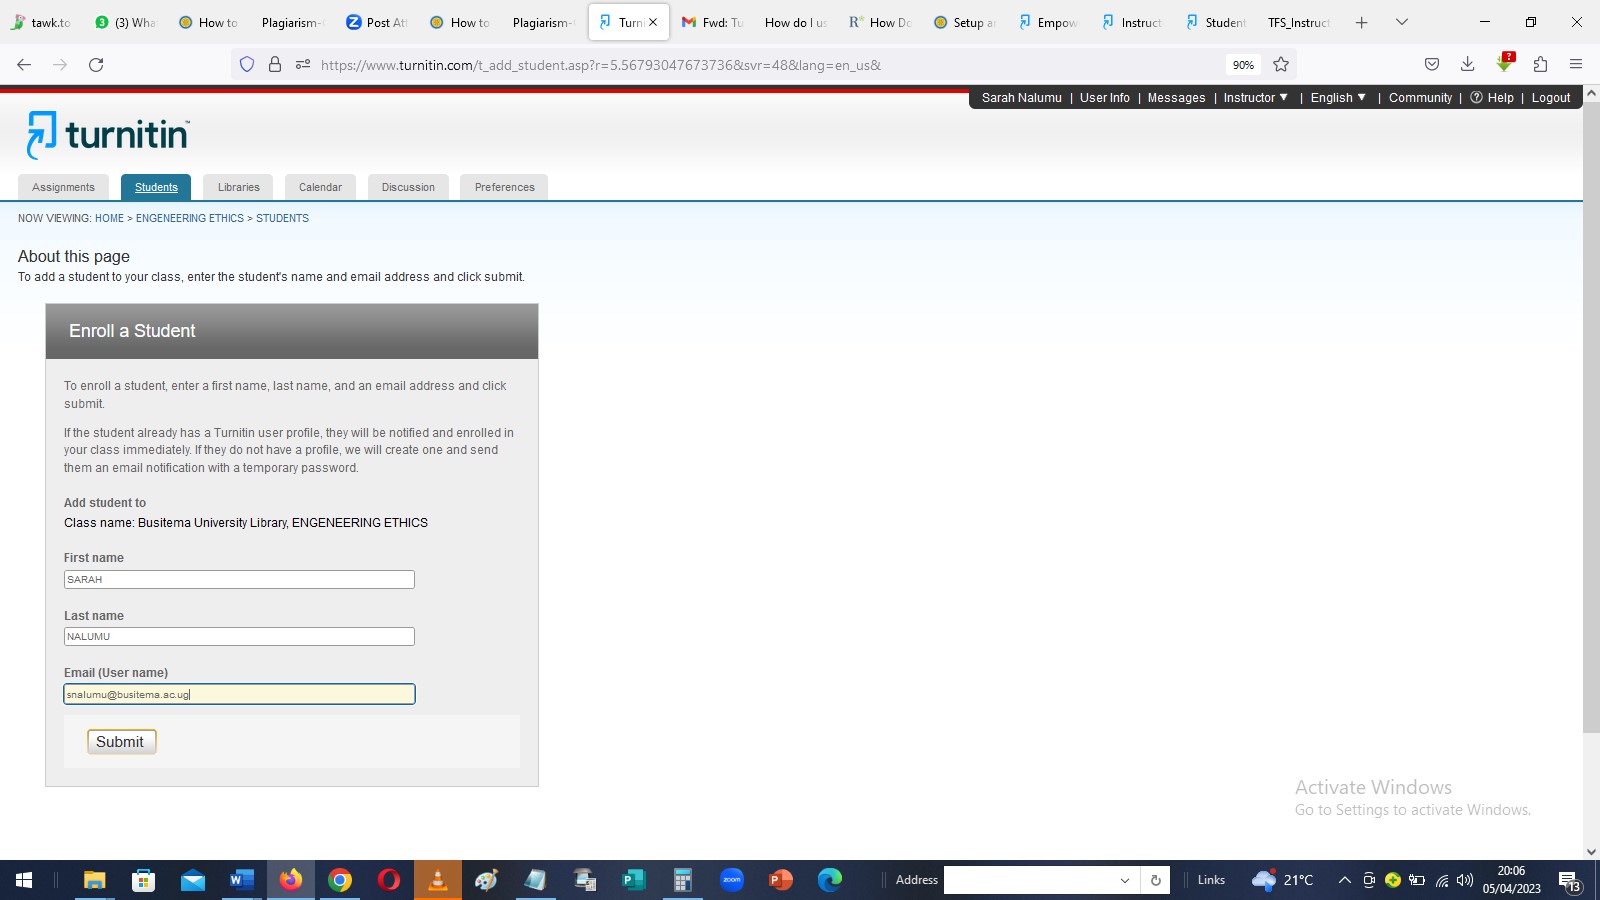
Add student
By clicking on the button for students as shown above with the red arrow, to allow an instructor enroll a student.
Instructors can add or allow students enroll them selves by sharing the class ID and enrolment key to the students
The diagram below shows an instructor enrolling student into the class
By clicking a submit button a student is already enrolled into the class and they can go on to add in their documents for similarity check.
Next step is to Switch account for an instructor to student so that I can be able to submit a document to Turnitin for similarity check
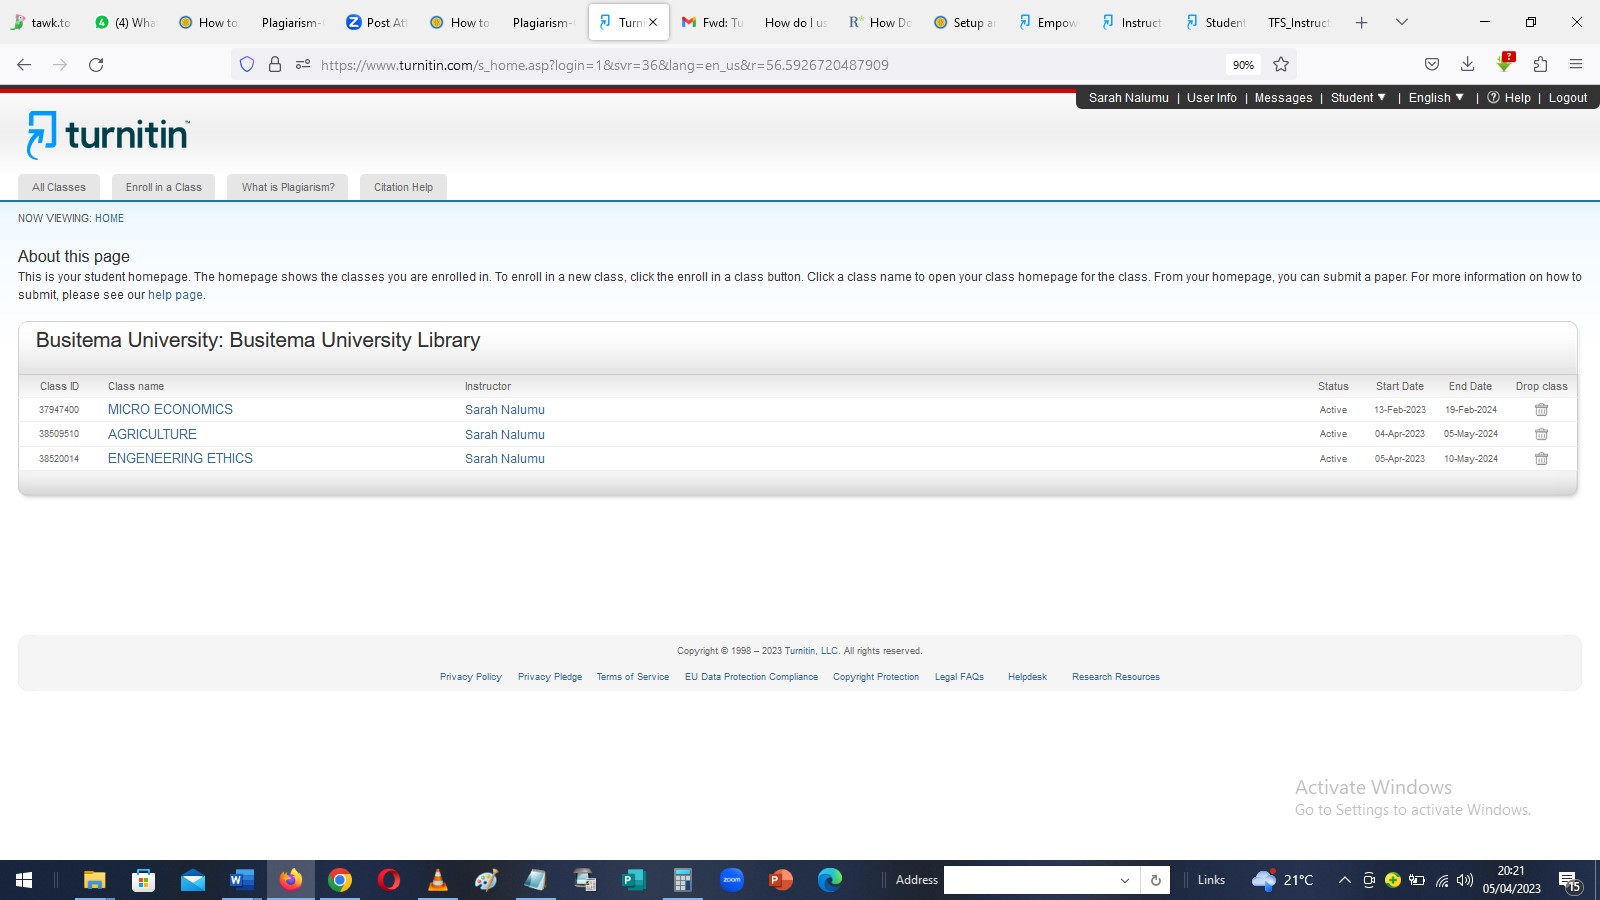
From the above diagram a it is indicated that a student is already registered to the class of Engineering Ethics and student can submit a paper by clicking on the class name “ENGINEERING ETHICS" as shown by the red arrow to be able to submit his/ her paper. A page below will appear.

From the diagram above, information on the assignment are displayed including the assignment tittle, info, start and end date, similarity but its blank because a student have not submitted a paper. Under actions, a student clicks on submit button as indicated with the red arrow to be able submit a document. This derives us to the below window.
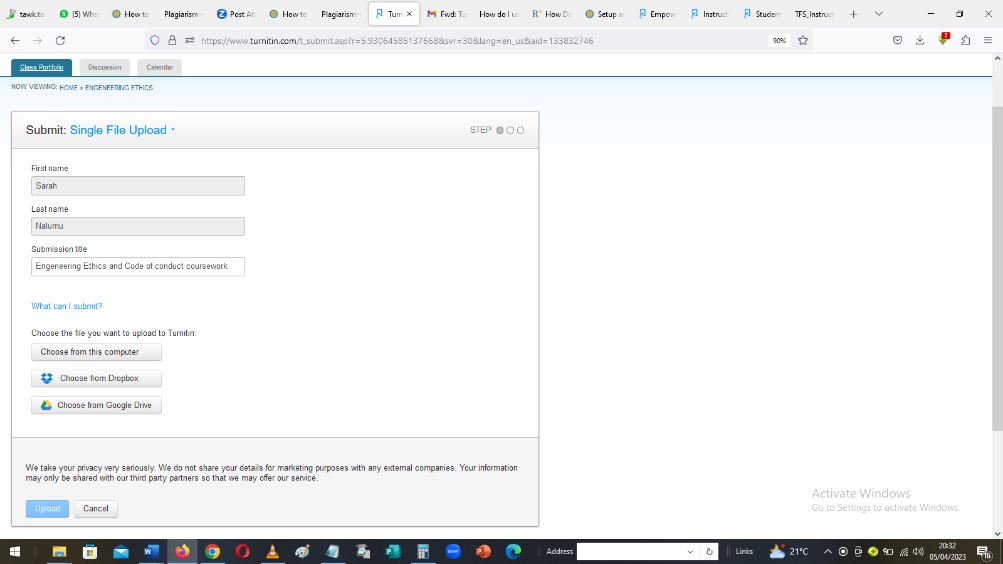
Files can be uploaded from the computer, Dropbox or google drive and upon completing uploading the file, students should press the upload button which takes us to the below page.
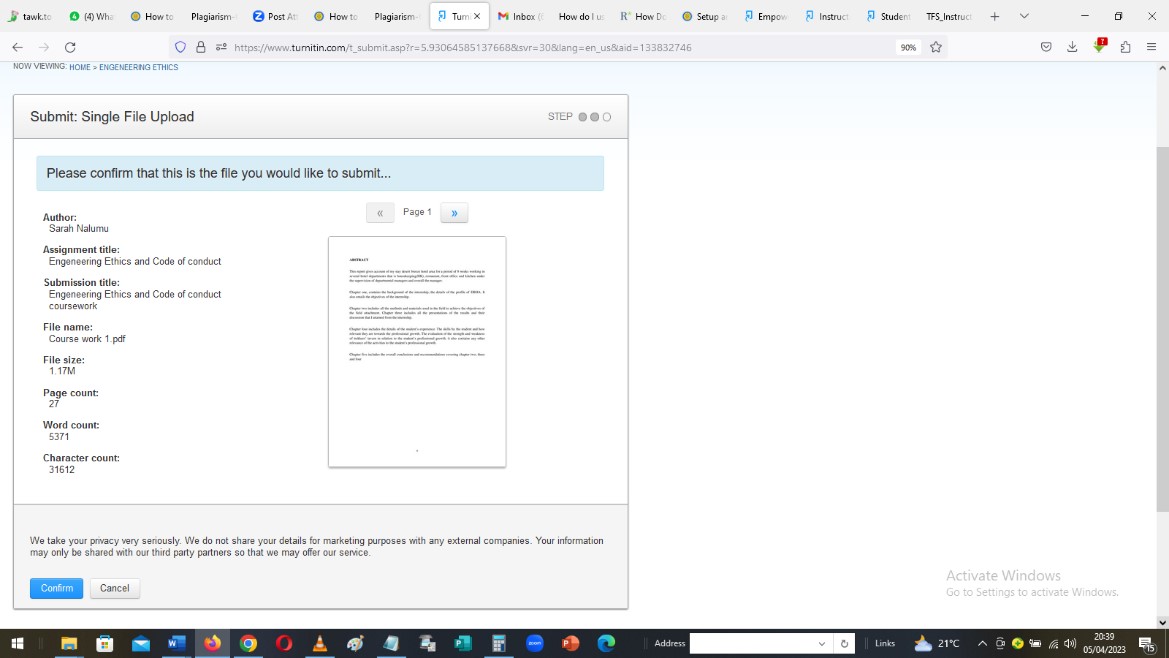
Click confirm your submission, upon which an email (with the receipt) will be sent to you. The below diagram shows the page that appears.

Remember, you have submitted as student. Click return to assignment list in and the page below will appear that enables a student to see his/her plagiarism report,

The above report indicates the assignment with start and end dates, a similarity percentage is indicated as 15%, meaning a student has plagiarized 15 %.
Resubmit button allows a student to another document after editing the similarities in the document.
Click on the similarity index 15% (the percentage) and the following report will open up
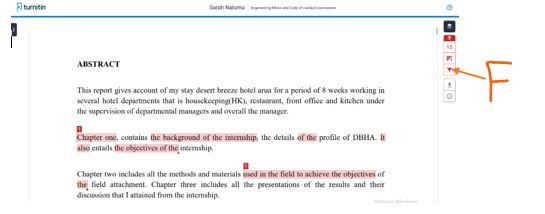
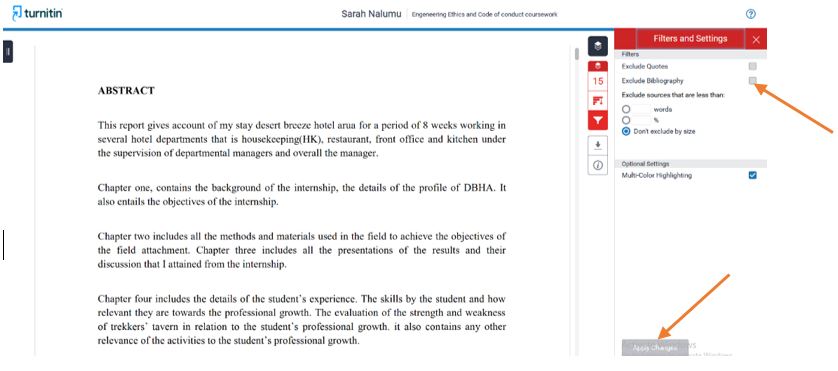
Click filter settings to filter out the references. The following will show up. Check the box of Exclude Bibliography and then click Apply changes below.
By filtering out the references (bibliography), and exclude quotes the report focuses on the real text and the initial similarity index will reduce significantly to allow you to identify the areas where you need to refine more.
The following will pop up after applying the changes. The new similarity index drops to 13%. You will now need to resolve anything above 1%
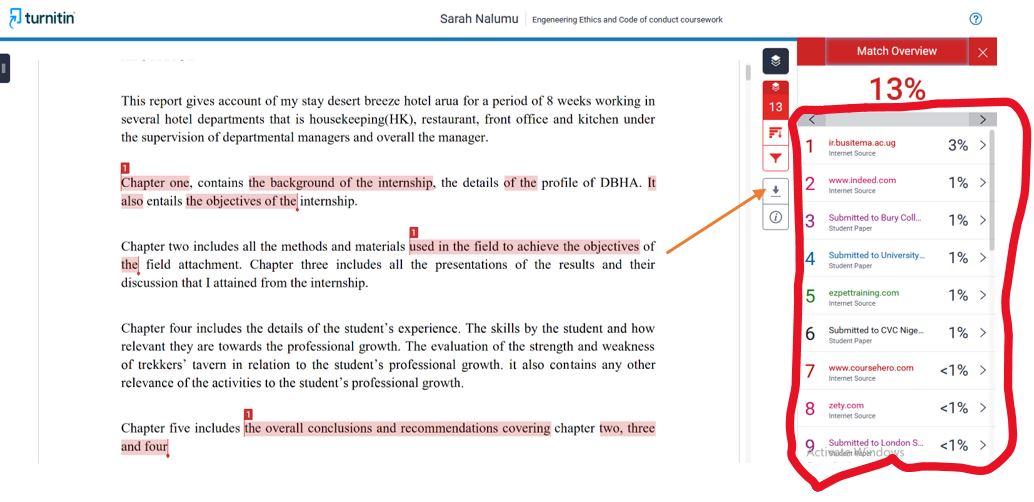
Now, to resolve the issues, you will need to go through the original document and compare with the report that has flagged out the similarity of more than 1% (1%>). Its advisable to do it side by side (needs bigger screen).
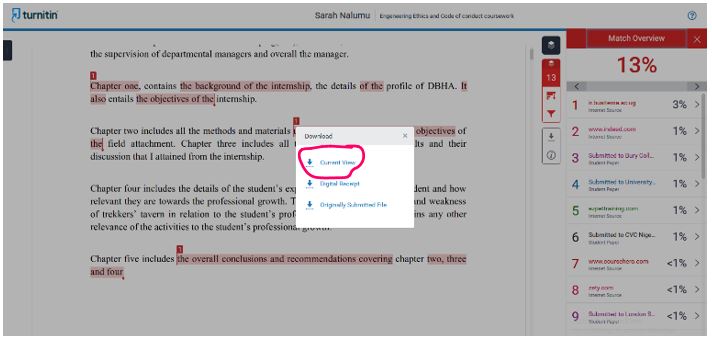
Once everything is resolved, proceed and download the report by clicking on icon shown by red arrow in the image above. The following will show up. Select download Current view.
Other tips will be explained in the live session. Thank you